 With Dr. Michael L. McSwiney
In June 1967, escalating tensions between Israel and the surrounding Arab nations erupted into open warfare when the Israelis launched a surprise air strike against the opposing air forces on the ground, followed by an attack against the Arab forces in the Sinai Peninsula. Within six days they had decisively beaten every Arab force opposing them. Despite its brevity, the Six-Day War was a complex affair fought on three fronts, and involved non-stop battles between an unusual variety of forces.
Since the founding of the modern state of Israel in 1948, there have been numerous wars fought between Israel and its Arab neighbors. While it would be simple to dismiss these conflicts as religious disputes, additional factors have almost always contributed to regional tensions which have so often escalated into full-scale war. The Six-Day War was no exception to this trend. In addition to the unresolved religious and territorial disputes resulting from the founding of Israel, water politics and even Cold War maneuvering contributed to the eventual outbreak of war in 1967.
1948: Independence
In 1947 the United Nations recommended the adoption of a plan which would divide the British Mandate of Palestine into separate Jewish and Palestinian states. While Jewish representatives accepted the plan, the Arab League vigorously opposed it, preferring instead that the Mandate become a Palestinian state which promised to respect the rights of the Jewish minority.
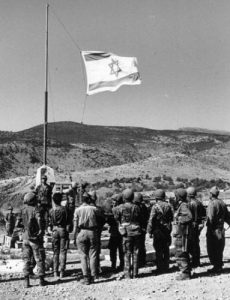
Conflict between the Jewish and Palestinian communities in the Mandate increased after the UN resolution and eventually escalated to the 1948 Arab-Israeli War, as a result of which Israel won its independence.
1956: The Suez Crisis
The Suez Canal provides a direct route between the Indian Ocean and the Mediterranean, saving a lengthy trip around Africa. Britain and France, who owned and controlled the Suez Canal, considered it to be vital to their global interests. Clashes between the Egyptians and the British garrison led to a coup against the Egyptian King Farouk in 1952, and the establishment of a republic under the presidency of Colonel Gamal Abdel Nasser.
When Nasser expelled the British and then seized the Suez Canal in October 1956, tensions between Britain, France, and Egypt reached breaking point. The British and French developed a plan to invade Egypt and reclaim the Suez Canal, and invited Israel to join them.
 Ten days later, Israel invaded the Sinai Peninsula, with the British and French invading Egypt the next day. In a little over a week Egypt was defeated and the fighting was over, but international condemnation soon forced the withdrawal of Britain, France and Israel. This left Nasser an Arab hero for standing up to the ‘Imperialists’.
There had long been a desire amongst Arabs to establish a united Arab state that would restore their power and international prestige. Nasser’s elevated status allowed him to form the United Arab Republic combining Egypt and Syria in 1958 as the Syrians struggled to avoid a Communist takeover. While the union only lasted three years before Syria split away in one of a seemingly endless series of coups, Egypt remained the United Arab Republic until 1972.
The Water War
Even agriculture was political in the Middle East, and could lead to war. As a small state surrounded by enemies, Israel sought to expand its population and feed the tens of thousands of immigrants arriving each year. In doing so, it started farming the demilitarised zone between Israel and Syria as well as the Negev Desert south of Jerusalem. Occupying the demilitarised zone in this way was seen as a hostile act by Syria, while the irrigation needed to farm the Negev gave them a way to strike back.
The Jordan River is the main source of water in the Holy Land, and clashes over water had been common after the 1949 armistice. These escalated in 1964 when Israel completed its National Water Carrier project to irrigate the Negev Desert. In response, Syria and Lebanon planned to divert the headwaters of the Jordan away from Israel, denying them access to the water.
In the resulting War Over Water, Israel used air and artillery strikes on construction work to prevent the headwater diversion going ahead, while Syria shelled Israeli farms in response.
Palestinian Terrorism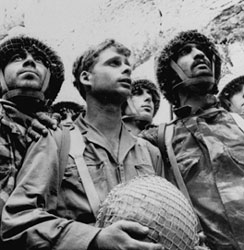
With the inability of the Arab states to destroy Israel and establish Arab control of the Holy Land, pressure increased to find other ways of striking at Israel. One of these was Fatah, ‘Conquest’ in Arabic, an organisation led by Yasser Arafat (who would later go on to lead the Palestinian Liberation Organisation). Supported by Syria, Fatah began a terrorist campaign against Israel in 1965.
While Egypt and Jordan did not permit Fatah to operate in their territory, Jordan, where most of the Palestinian population resided, found itself unable to prevent most of the raids from being launched from bases in the West Bank.
The raids escalated, culminating in a landmine killing three Israeli soldiers and injuring several others. This was the seventieth attack in two years. With the United Nations unable to even investigate who was responsible for the incidents (thanks to the Soviet Union’s veto), Israel took matters into its own hands. On 12 November, 1966, the Israelis captured, and demolished the town of Samu. Located in the Jordanian West Bank, this was where the raid was believed to have originated. This caused a major diplomatic incident and earned Israel the censure of the United Nations.
The Road To War
From here the descent into war was swift. Jordan, in response to (totally incorrect) Soviet intelligence that Israel was massing on the Syrian border, promised to attack Israel if Israel attacked Syria. Syria, not to be outdone, responded by declaring that they would destroy the Jewish state. Unsurprisingly, this declaration and their support for Fatah gave Syria a lot of kudos in the Arab world.
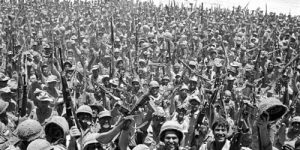
Nasser, the self-proclaimed leader of the Arabs, sought to regain lost prestige by upping the ante even further. On 16 May, 1967, his United Arab Republic sent its army into the Sinai Peninsula and demanded the withdrawal of the UN peacekeepers, who had been in place since the end of the 1956 Suez crisis. While Israel mobilised its reserves, Jordan’s King Hussein closed ranks with Egypt and Syria, largely to avoid a popular uprising at home. Iraq, Kuwait, Libya, and other Arab states started sending their armed forces as well. Sabre rattling, especially in the Arab world, quickly reached the point of no return at the end of May when Nasser stated, ‘Our basic objective will be the destruction of Israel.’
 Israel Attacks
With the armed forces of the entire Arab world massing on its borders, Israel decided to not wait until it was attacked. As Nasser’s United Arab Republic was the largest and best-equipped adversary facing them (thanks to massive arms deliveries from the Soviet Union), Israel decided that it needed to neutralise it first, before the other Arab states could support it.
At dawn on 5 June, 1967, Israel commenced Operation Moked (Focus), a surprise attack planned to hit the United Arab Republic Air Force on the ground. Nearly all of Israel’s operational jets penetrated Egyptian airspace at low altitude in a surprise attack that crippled the United Arab Republic Air Force, destroying 293 aircraft for the loss of just 19 aircraft out of the 183-strong strike force.
Red Sheet
As soon as word of the success of Operation Moked reached Israel, the signal Sadin Adom (Red Sheet) went out to the troops waiting near the Egyptian border. Although outnumbered, the Israelis planned to surprise the United Arab Republic’s Sinai Field Army with a three-pronged attack which would outflank key defensive positions, neutralizing the enemy’s numerical advantage.
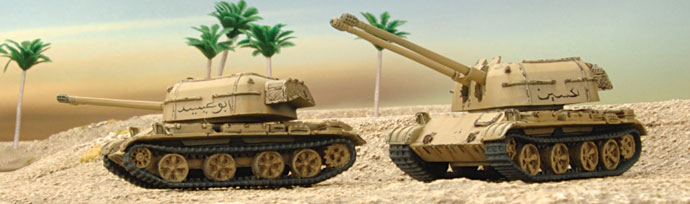
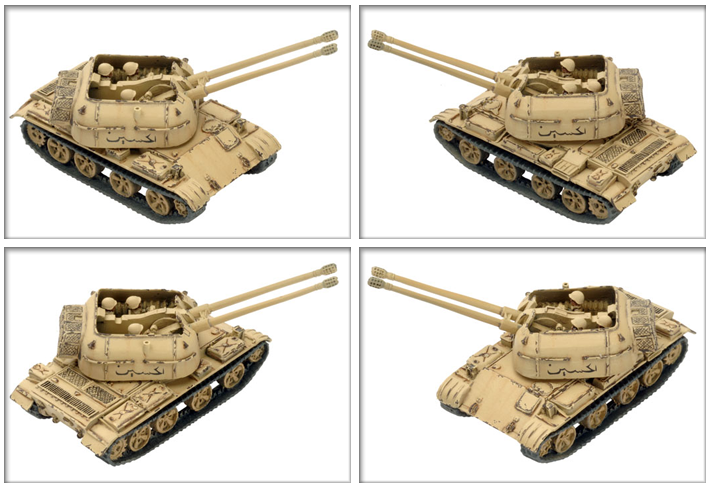
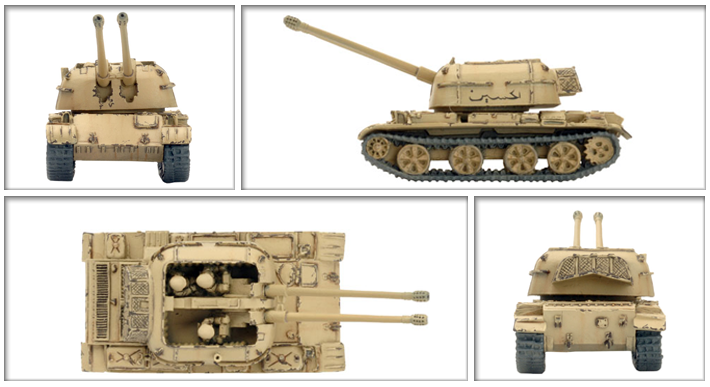
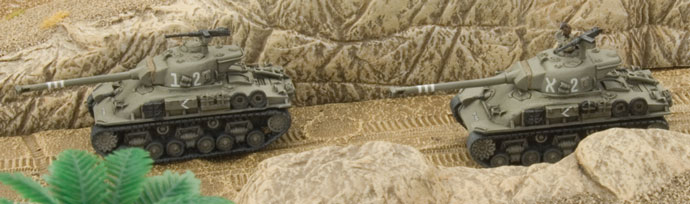
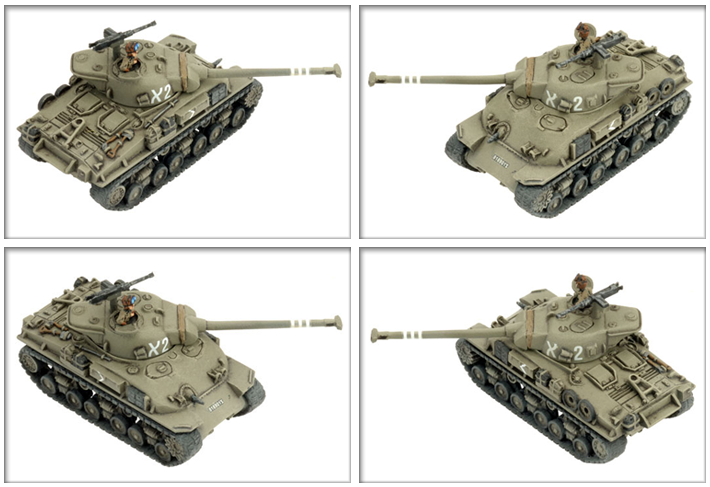
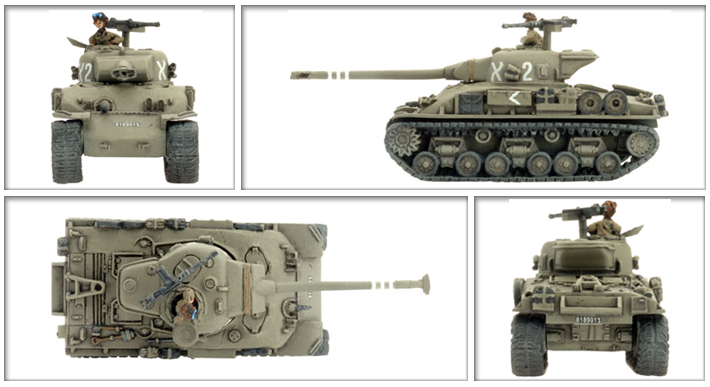
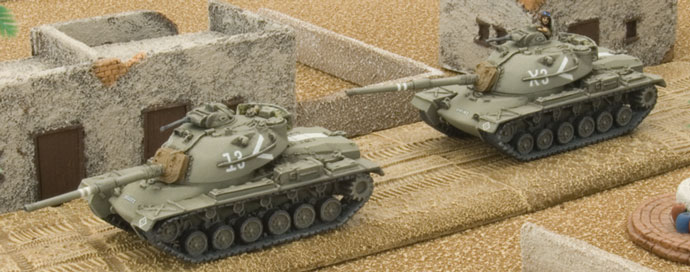
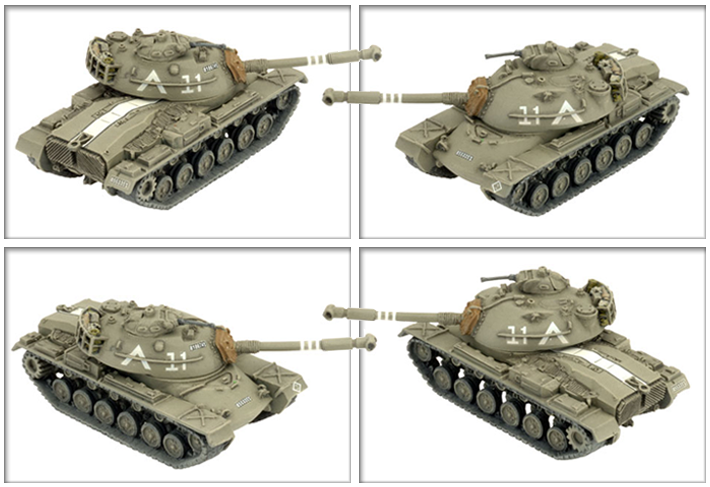
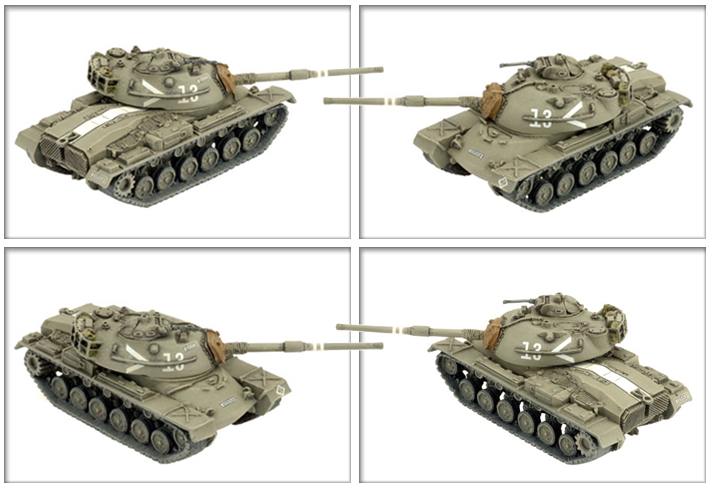
The northern prong was Brigadier General Israel ‘Talik’ Tal’s division, tasked with taking the Rafah Junction and El Arish to open the coastal road to the Suez Canal. Here the Arabs had their own 7th Infantry Division (under Major General Abd el Aziz Soliman) and the Palestinian 20th Infantry Division (led by Major General Mohammed Abd el Moniem Hasni) in layered defences laid out according to Soviet doctrine. The advance, led by the Magach (M48 Patton) and Sho’t (Centurion) tanks of the 7th Sa’ar (Storm) Armoured Brigade, quickly ran into about 30 Palestinian Sherman tanks and over 100 Arab T-34 medium and IS-3 heavy tanks backed up by SU-100M tank destroyers.
The hard fighting for Khan Yunis in the Gaza Strip, and then Rafah on the Sinai border, took the entire day, despite the 60th Armoured Brigade (equipped with M51 Isherman and AMX light tanks) and 202nd Paratroop Brigade attacking Rafah from the flank. By nightfall, one battalion had broken through to El Arish (but was critically low on fuel and ammunition) and another was on the way south from Rafah, but the rest of the division was still mopping up resistance. Throwing caution to the wind, and concerned about a possible counterattack by the Arab 4th Armoured Division, Tal ordered his troops to stop clearing their supply line and to push on through the night. By dawn El Arish was secure and the Arab forces destroyed.
Bir Lahfan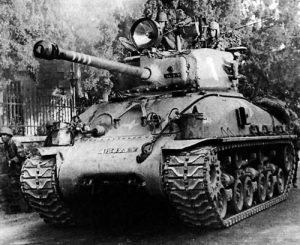
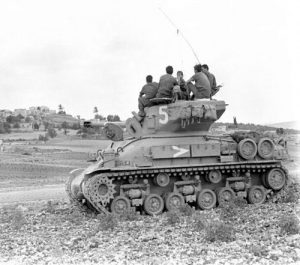
Tal’s fears about a counterattack by Major General Sidki el Ghoul’s 4th Armoured Division were well founded. By nightfall, while the Israelis were still fighting at Rafah, several hundred Arab T-54 and T-55 tanks were nearing the road junction at Bir Lahfan, just south of El Arish. Fortunately for Tal, Brigadier General Avraham Yoffe’s division had been ordered to advance up the uncharted Wadi Haradin, a driedup river bed in a steep-sided gully. The advance took all day, with the Centurion tanks crawling over soft sand and through rocky defiles, but the 200th Armoured Brigade reached Bir Lahfan with the Arabs completely unaware of their advance.
The Arab tanks drove up the road, headlights on. One volley and the situation changed completely as the Arabs switched off their lights. The Arab tanks had infrared searchlights, and began to engage the Israelis out of the darkness. Some Israeli command tanks had searchlights and used these to engage, but were rapidly picked off. The rest of the Israelis were reduced to shooting at gun flashes. The Israeli tanks were running low on ammunition as dawn approached, but were saved by helicopters delivering ammunition, and the arrival of the 7th Armoured Brigade from El Arish around 1000 hrs.
Abu Ageila
The southern prong was spearheaded by Major General Ariel Sharon (later Prime Minister of Israel). His division’s goal was to clear the road through the interior of the Sinai via Abu Ageila and Jebel Libni. Sharon faced Major General Sa’adi Nagib’s 2nd Infantry Division with its regiment of T-34 and IS-3 tanks and SU-100M tank destroyers, supported by a brigade of artillery. The division was well fortified, with minefields and trench systems along the Um Katef ridge blocking the main route to Abu Ageila.
Sharon’s detailed and complex plan combined airmobile and ground operations. During the day Sharon moved his troops into position and probed the defences. When his attacks were rebuffed, Sharon waited until nightfall to press the attack. Under cover of the biggest artillery force ever assembled by the Israelis, Sharon’s infantry attacked the northern end of the Um Katef line while the supporting tanks attacked from the front, pouring fire into the trenches ahead of the infantry advance. Meanwhile a small unit of paratroopers (reduced even further by the diversion of their helicopters to resupply Yoffre’s troops at Bir Lahfan) landed behind the Arab artillery park and attacked them from the rear. This significantly reduced the amount of artillery fire falling on the main attack. The defences were soon breached and, although they were slowed by mines, the 14th Armoured Brigade pushed through to take Abu Ageila and link up with Yoffre’s force.
 Race To The Suez
When reports of the fall of El Arish and Abu Ageila reached the Egyptian Field Marshal ’Abd al-Hakim ’Amr, he panicked (as he had in 1956) and ordered a general retreat to the Suez Canal. Although the Arab army had taken losses and given ground, it was far from defeated and retained many formations in good order. However, this single order sealed its fate. With the Sinai Field Army now in full retreat, the Israeli armoured brigades bypassed the enemy ground forces and pushed for the Suez taking the critical passes in the central Sinai, while the Israeli air forces pounded the fleeing columns. By 8 June, after just three days, the Israeli capture of the Sinai was complete.
The West Bank
Despite the success of the initial Israeli attacks, President Nasser convinced King Hussein of Jordan that the United Arab Republic was winning a crushing victory against Israel, with their forces closing in on Tel Aviv and Jerusalem. Jordan responded with air and artillery strikes on Israeli airfields and cities and prepared to attack southward to link up with Nasser’s fictitious attack. Israel attempted a diplomatic solution with Jordan, but King Hussein replied ‘the die is cast’.
Jordan’s pre-war plans for Operation Tariq (Victory) called for the capture of the Jewish part of Jerusalem as a bargaining chip for the ground they expected to lose to the Israelis. Instead, they opened their war by moving the 60th Armoured Brigade south from its reserve position to link up with Nasser’s nonexistent attack, and moved the 40th Armoured Brigade into reserve.
The Israelis took advantage of this to launch an offensive to protect the route between Jerusalem the rest of Israel, and another from the north to cut off the entire West Bank from Jordan east of the Jordan River. The Israelis attacked a series of Jordanian positions overlooking the road into Jerusalem, taking them all on the first day. As in subsequent battles, the Jordanians fought hard until their fortifications were breached, then fragmented and were mopped up in small groups. By 1000 hrs on 6 June, after 24 hours of hard fighting, the bulk of Jerusalem was in Israeli hands.
 In the north, Brigadier General Elad Peled’s division struck south on two axes, aiming to take the town of Jenin from behind with one brigade, while bypassing it and pushing on to Nablus, a key position in the centre of the Jordanian positions, with the other brigade. The Israeli armoured brigades, mainly equipped with ipgunned Sherman tanks, ran into the lead elements of the Jordanian 40th Armoured Brigade at nightfall, and struggled to overcome the heavier Jordanian M47 and M48 tanks holding defensive positions for most of the next day, despite heavy attacks by the Israeli Air Force.
Fortunately for Peled’s men, King Hussein, fearing an Israeli invasion of central Jordan, ordered all of his forces back across the Jordan River on the night of 6 June. Realizing that the way lay open, the Israelis raced forward to complete the capture of the entire West Bank.
Israeli forces had avoided entering the Old City in the first two days of fighting fearing damage to holy sites and international backlash. However, by 7 June, with a UN imposed ceasefire presumed to be imminent, Israeli paratroopers finally assaulted and captured the Old City as well.
Golan Heights
Despite being the prime cause of the war, Syria had only conducted minor offensive operations on 5 and 6 June, easily repulsed by Israeli forces, then hunkered down behind their Golan Heights fortifications. Having dealt with the United Arab Republic and Jordan, Israel turned its attention to Syria. After vigorous debate, senior Israeli politicians approved military operations against Syria. These commenced at 1130 hrs on 9 June, attempting to beat the UN ceasefire deadline set for the next day.
The Golan Heights were almost impassable to tanks, with heavilyfortified with bunkers to a depth of several kilometres. The fighting was brutal and often at very close range. This resulted in the Israelis losing more tanks here than on either of the other two fronts, despite a lack of large-scale clashes with enemy armour. Israeli forces broke through the initial line of resistance and reached the Golan Plateau by the evening, but fearful of a Syrian counterattack, continued their advance throughout the night. By the morning of 10 June, the Syrian forces were in full retreat, demolishing their own bunkers as they fell back.
 Ceasefire
On 11 June, 1967, a general ceasefire agreement was signed ending the Six-Day War. By this point, Israel had captured the Sinai, West Bank, Gaza Strip, and the Golan Heights, increasing its territory greatly. However, this also added a million Arabs to its governed population. While these new territories would serve as useful buffer zones against future aggression, the addition of such a large, essentially hostile, population would prove to be a constant problem.
While the 1967 Six-Day War proved that Israel had the means and political will to defend itself, it did not lead to a lasting peace. Israel hoped to use the Sinai and Golan Heights as bargaining chips for long-term peace treaties with the Arab states, but to the Arabs ‘The Setback’ as they named the war had to be avenged. The next six years saw constant skirmishing across the Suez Canal, then, in 1973, the Yom Kippur War saw a new Egyptian-Jordanian-Syrian alliance try to reverse their humiliating defeat in the Six-Day War. Though that war would eventually pave the way to a peace process between Israel and some of its neighbours, the region remains volatile to this day.
~Dr. M. L. McSwiney.
 Your First Game
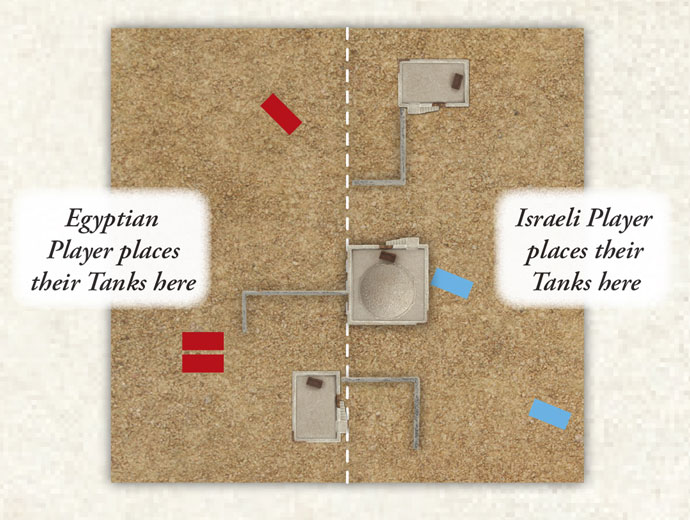
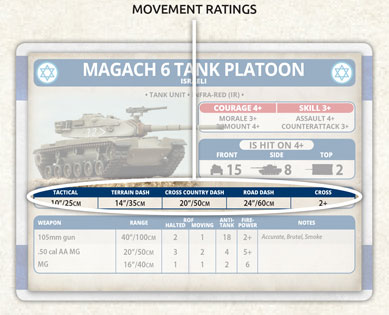 Let’s look at your tank card to find how far each tank can move .
 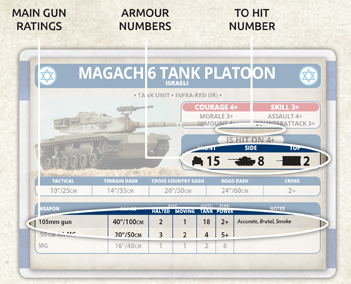 3. Roll To Hit

 You can now download Fate Of A Nation on the Flames Of War Digital App.