Posted on

Assembling the ZSU-23-4 AA Company

Step 1. Begin assembly by adding the tracks. there are left/right indicators on the back of each track to ensure they are put on the correct way.

Step 1c. Left and right tracks attached.

Step 2. Next glue the radar dish onto the top of the turret. There are two small notches towards the rear that the radar mount will fit into.

Step 3. The cannon assembly comes in two pieces. There are three small bumps and corresponding divots to ensure the two halves are positioned correctly.

Step 3c. The cannon halves glued together correctly

Step 4. Glue the cannon mount into the front of the turret. You’ll notice there are small notches on one side of the guns. These should be facing down.

Step 5. Next place the turret into the body of your ZSU-23-4 Shilka and you’re done!

The Finished ZSU-23-4 AA Shilka

Posted on

ZSU-23-4 AA Company (AARBX08)

Includes two ZSU-23-4 Self-propelled Anti-aircraft guns,

Designed as a replacement for the ZSU-57-2, the ZSU-23-4 “Shilka” replaced the twin 57mm guns with four 23mm cannon with a far greater ammunition capacity. The Shilka is also equipped with an integral radar to allow automatic tracking of targets rather than optical tracking.

Check out the ZSU-23-4 in the online store here… 

Designed by Evan Allen
Painted by Aaron Te Hira-Mathie

The ZSU-23-4

The ZSU-23-4 AA Company in Fate Of A Nation
Unit Cards for the ZSU-23-4 AA Company are contained in the Egyptian Unit Card Pack (AAR901)…
Unit Cards for the ZSU-23-4 AA Company are contained in the Syrian Unit Card Pack (AAR902)…

Posted on

T-62 Tank Battalion (AARAB01)

Includes nine plastic T-62 tank sprues, two plastic Tank Commander sprues two Decal Sheets and two ZSU-23-4 Self-propelled Anti-aircraft guns

When the British fitted their Centurion with a 105mm gun, the Soviet leadership demanded that the T-55 be fitted with a bigger gun than its current 100mm. The result was the T-62 which mounted a smoothbore 115mm firing a fin-stabilised round. Egypt acquired several hundred in time for the 1973 Yom Kippur War

Check out the T-62 Tank Company in the online store here… 

Designed by Tim Adcock
Painted by Aaron Te Hira-Mathie

The T-62 Tank

The T-62 Sprue

The ZSU-23-4

The T-62 Tank Battalion in Fate Of A Nation
Unit Cards for the T-62 Tank Battalion are contained in the Egyptian Unit Card Pack (AAR901)…
Unit Cards for the T-62 Tank Battalion are contained in the Syrian Unit Card Pack (AAR902)…

Posted on

IS-3M Assembly Guide (AARBX01)

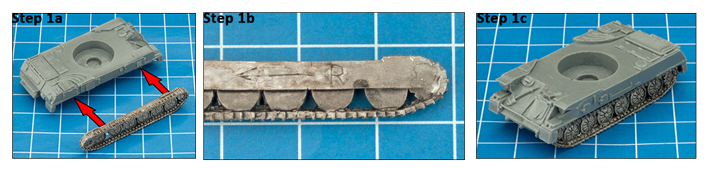
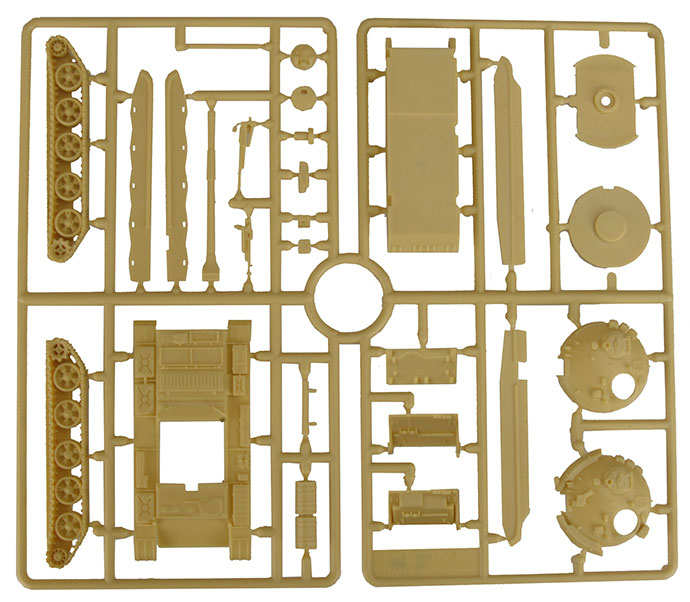
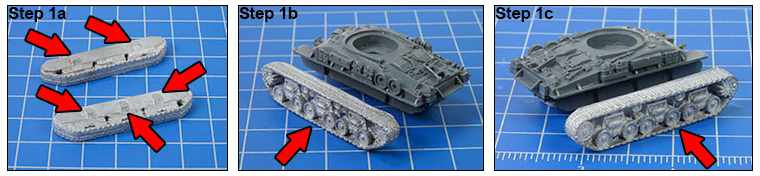
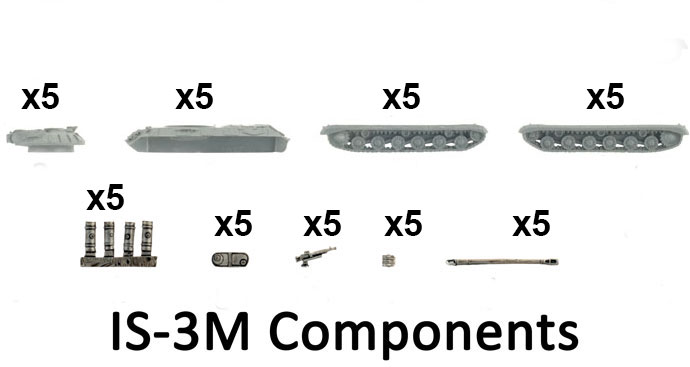
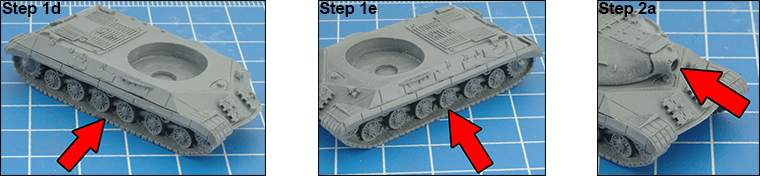
Step 1. Begin assembly of the IS-3M by attaching the tracks to each side of the hull.

1b & c. Each track has been keyed to correspond with a particular side of the hull; this aids in ensuring the correct orientation of the tracks when assembling the miniature.

1d & e. Attaching the tracks to the hull of the IS-3M.

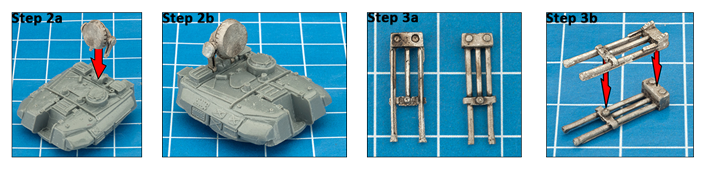
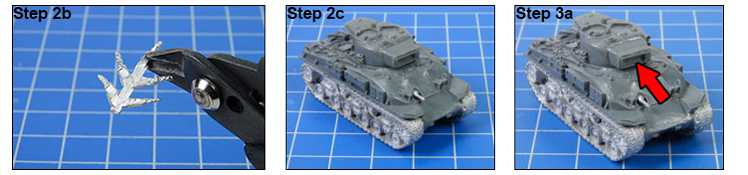
Step 2a. Next, attach the main gun to the gun mantlet.

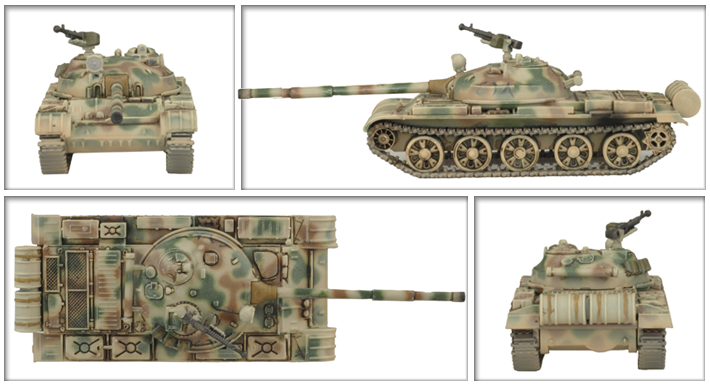
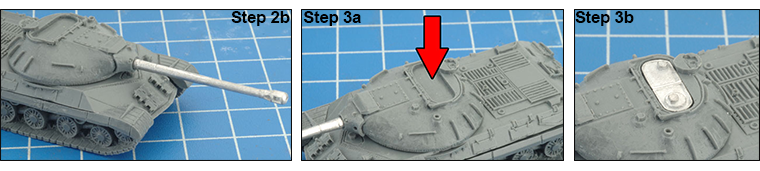
2b. The main gun attached to the turret.

Step 3a. Attach the turret hatch to the top of the turret.

3b. Turret hatch in place.

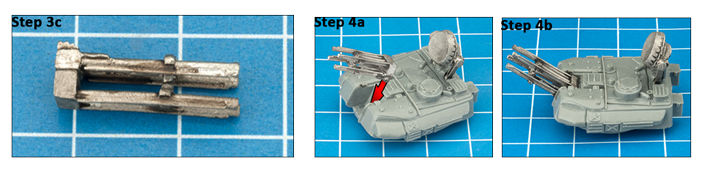
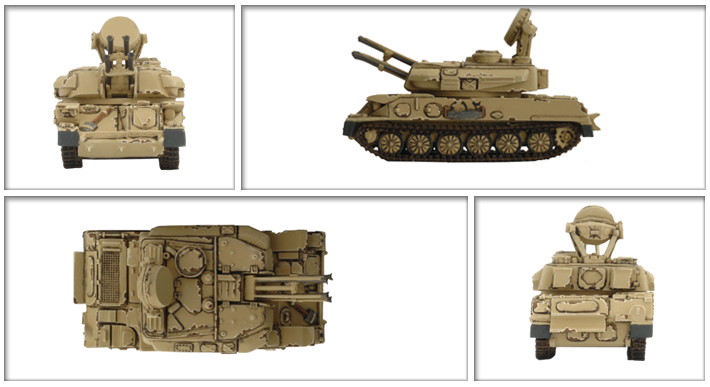
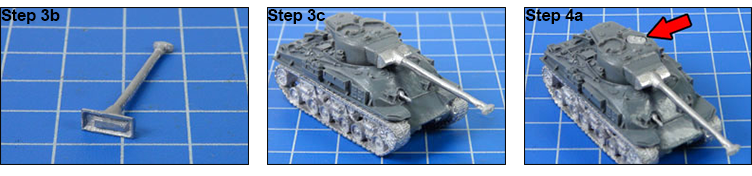
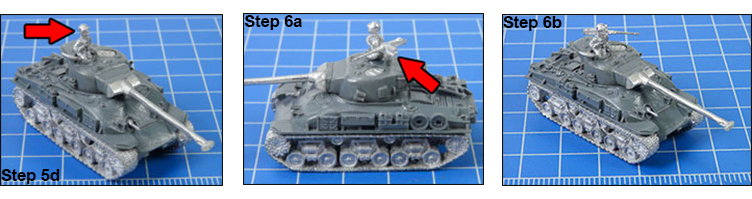
Step 4a. Next, attach the .50 cal AA MG to the rear of the turret.

4b. The .50 cal AA MG attached to the rear of the turret.

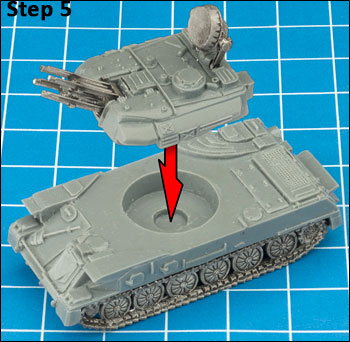
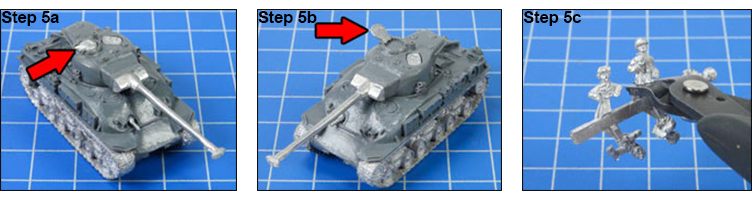
Step 5a. Attach the smoke canisters to the rear of the hull using the recesses shown in the image below.

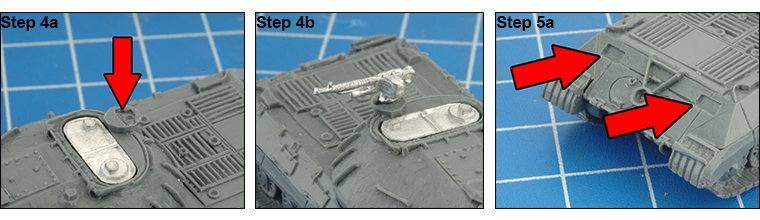
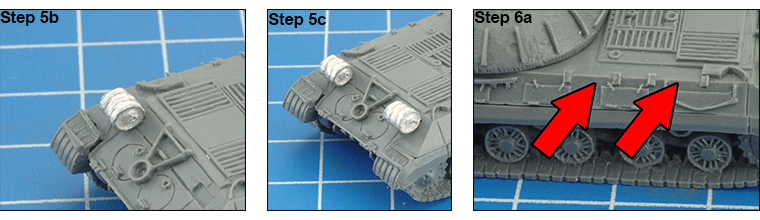
5b. A smoke canister attached successfully to the rear of the IS-3M hull.

5c. Adding the second smoke canister to the rear of the hull of the IS-3M.

Step 6a. Next, attach the external fuel tanks to the edges of the engine deck of the IS-3M.

6b,c & d. The external fuel tanks added to both sides of the IS-3M hull.

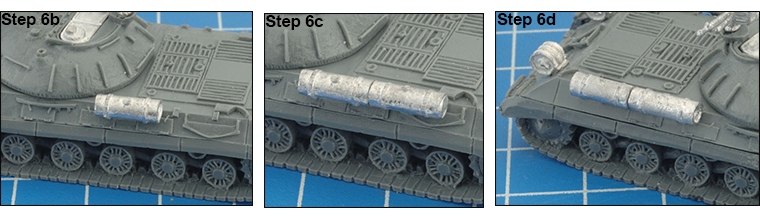
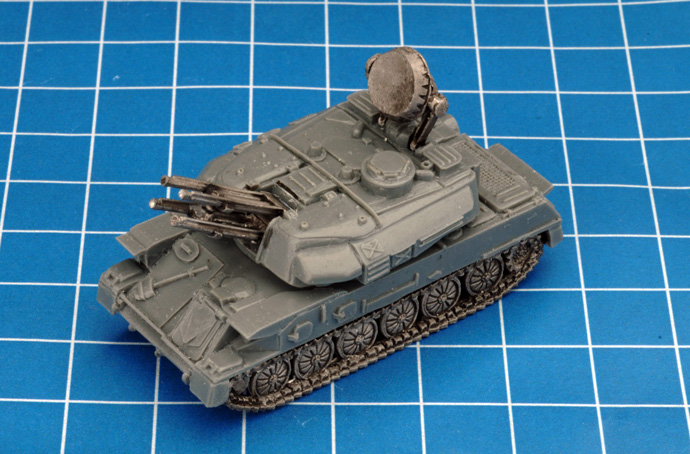
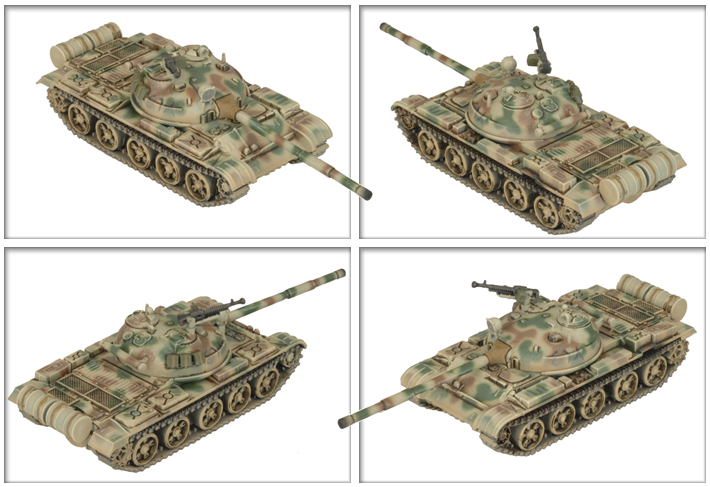
With the external fuel tanks attached; the IS-3M is now fully assembled.
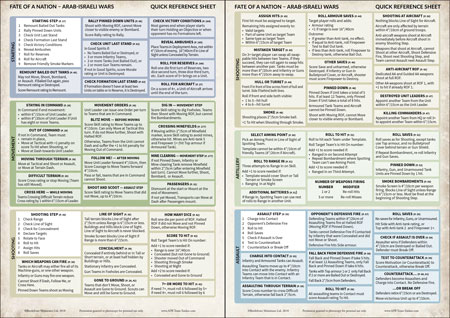
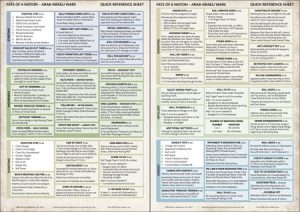
Posted on

Sherman (75mm) Assembly Guide (AISBX04)

M50 Sherman Components

Step 1. Begin assembly by attacking the tracks to the hull of the M50 Sherman.

1a. Each track has been keyed to correspond with a particular side of the hull; this aids in ensuring the correct orientation of the tracks when assembling the miniature.
1b. The correct alignment for the left-hand side track
1c. The correct alignment for the right-hand side track

1d. The left-hand side track attached to the hull
1e. The hull machine-gun correctly attached to the front of the hull

Step 2a. Attach the hull machine-gun to the hull.

2b. The hull machine-gun sprue note: we include extra MGs for ease- keep the spares in your bits box!
2c. The hull machine-gun correctly attached to the front of the hull

Step 3a. Attach the main gun to the turret

3b. The main gun ready for assembly.
3c. The main gun correctly attached to the turret.

Step 4a. Attach the hatches to the turret.

Step 5. Attach the commander’s hatch to the turret (closed)

5a. The commanders hatch modeled closed
5b. (optional) the commander’s hatch modeled open.
5c.  Snip your chosen commander from the sprue.

5d. The tank commander correctly attached to the turret

Step 6a. Attach the .50 cal AA MG to the turret

6b. With the tank commander and AA MG in place, the M50 Sherman is fully-assembled and ready for painting.

Posted on

Beasts Of War – Isherman Unboxing

The Beasts Of War team is back with another unboxing video. Today they look at the Isherman tank, also known as the Super Sherman. In this video they talk about one of the most unique tanks that Israeli forces fielded  and the history that led its development and pushed the absolute limit of what could be done with a Sherman tank. 

Beasts Of War – Unboxing: Fate Of A Nation -M51 Isherman Tank…