M50 Sherman Components

Step 1. Begin assembly by attacking the tracks to the hull of the M50 Sherman.
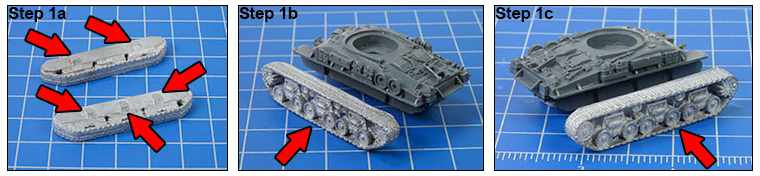
1a. Each track has been keyed to correspond with a particular side of the hull; this aids in ensuring the correct orientation of the tracks when assembling the miniature.
1b. The correct alignment for the left-hand side track
1c. The correct alignment for the right-hand side track
1d. The left-hand side track attached to the hull
1e. The hull machine-gun correctly attached to the front of the hull
Step 2a. Attach the hull machine-gun to the hull.

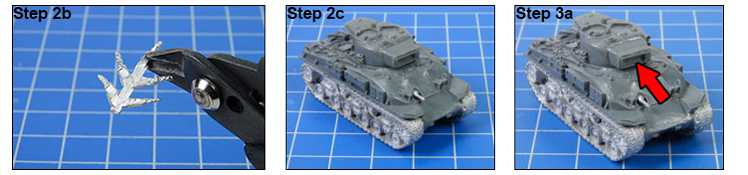
2b. The hull machine-gun sprue note: we include extra MGs for ease- keep the spares in your bits box!
2c. The hull machine-gun correctly attached to the front of the hull
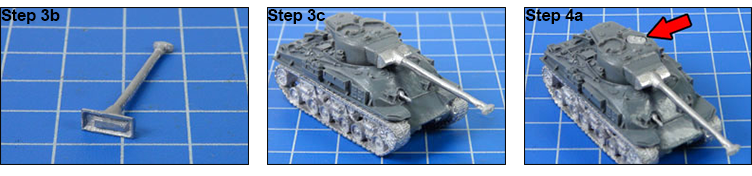
Step 3a. Attach the main gun to the turret
3b. The main gun ready for assembly.
3c. The main gun correctly attached to the turret.
Step 4a. Attach the hatches to the turret.
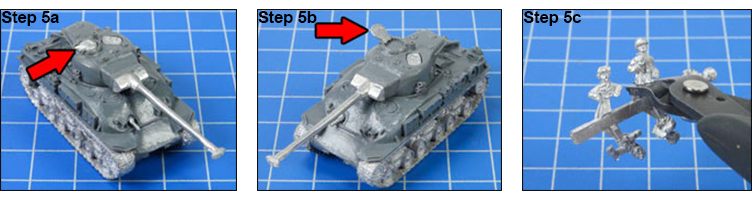
Step 5. Attach the commander’s hatch to the turret (closed)
5a. The commanders hatch modeled closed
5b. (optional) the commander’s hatch modeled open.
5c. Snip your chosen commander from the sprue.
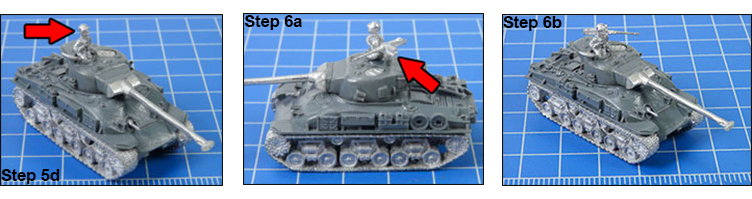
5d. The tank commander correctly attached to the turret
Step 6a. Attach the .50 cal AA MG to the turret
6b. With the tank commander and AA MG in place, the M50 Sherman is fully-assembled and ready for painting.